|
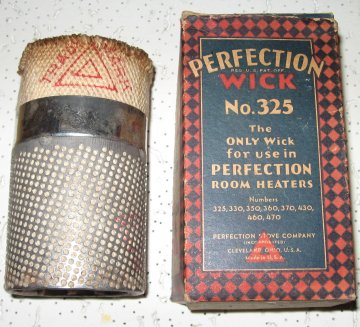
The Perfection 325 wick sleeve for Perfection heaters #53 and
the 300 - 400 series heaters is 2 3/4'' in diameter, same as the
Perfection 500 - 1700 series heaters - but different in design
and the two wick sleeves are not interchangeable. The
perforations in the
325 wick
sleeve are not for engagement in a vertical pattern as are
Perfection 500 wick sleeves. |
|
|
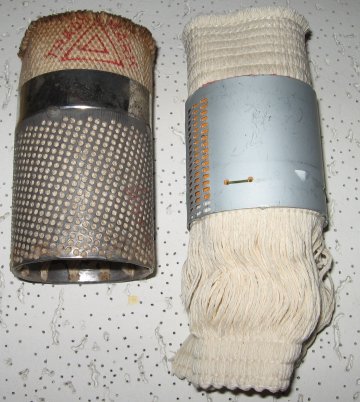
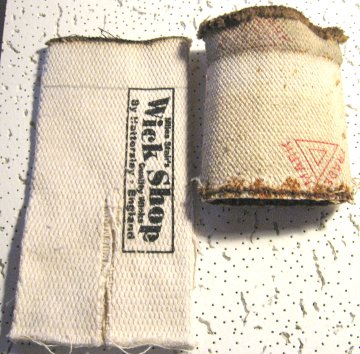
At right, a Perfection 325 wick
compared with a Perfection 500 wick. Note
that the 325 wick does not have "tails" below the
wick carrier.
|
|
|
|
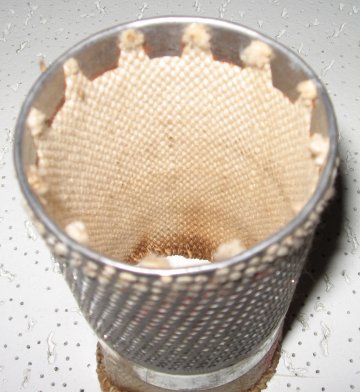
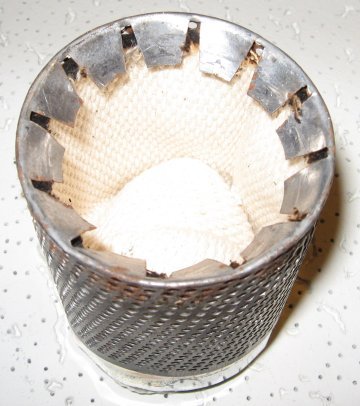
At left, a view of the bottom of
an original Perfection 325 wick. The metal
tabs are gently pried up with a flat bladed
screwdriver and the old wick pulled out from the
top, as shown at right.
|
|
|
|
The left photo shows my special
Perfection diameter wick on the left, compared to
the original Perfection 325 wick removed from the
carrier, as shown above. The new wick is then cut
with 5" of the top remaining. A heavy pair of
shears will cut the wick.
|
|
The new
trimmed wick is then inserted (cut side down) into
the old steel carrier. Make sure the wick
fits under the tabs, as shown at right. The
tabs can then be crimped back on the wick with a
pair of pliers, but they can also crimp the folded
edge of the tab too tightly. It is better to
push the top of the tab down with a flat bladed
screwdriver until it is tight against the
wick. That will ensure the tabs can be bent
out again to accept another new wick. The new
wick can then be installed following the directions
shown below from a 325 wick box.
|
|
|
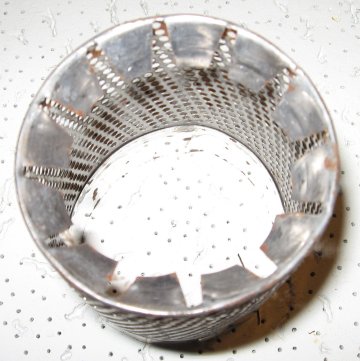
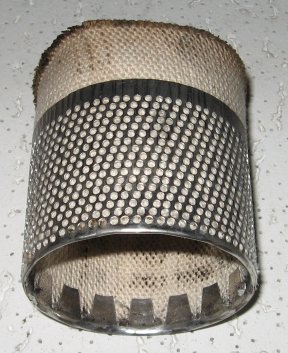
The wick sleeve shown above is
NOT a 325 wick sleeve. |
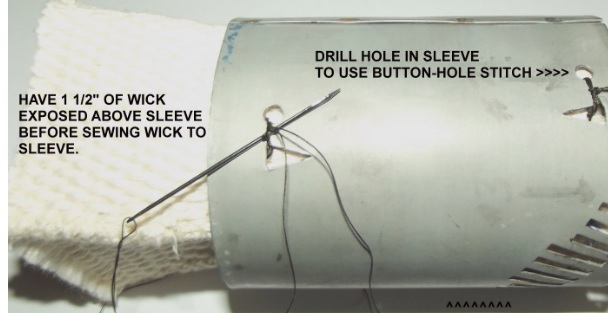
If the tabs (above) break off,
the wick sleeve can still be used by sewing the wick into the
sleeve using a button hole stitch through existing holes in the
wick sleeve. The photo at right shows how the button hole stitch
can be used in many types of wick sleeves. |
|
Wick without carrier for Perfection 300 and 400
heaters, $15.95
|
|
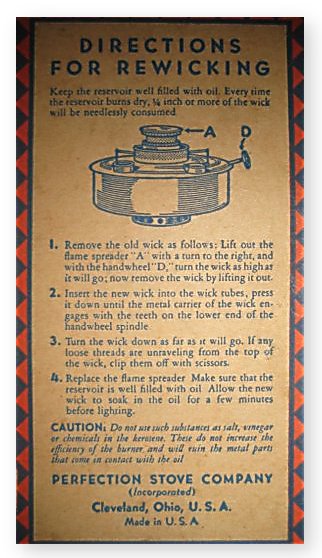
1. Remove the old wick
as follows: Lit out the flame spreader "A" with a turn to
the right, and with the bandwheel "D", turn the wick as high as it
will go; now remove the wick by lifting it out.
2. Insert
the new wick into the wick tubes, press it down until the metal
carrier of the wick engages with the teeth on the lower end
of the handwheel spindle.
3. Turn the wick down as far as it will
go. If any loose threads are unraveling from the top of the
wick, clip them off with scissors.
4. Replace the flame
spreader. Make sure that the reservoir is well filled with
oil. Allow the new wick to soak in the oil for a few minutes
before lighting. |
|


